
Dev Blog: Inheritance in Unity 3D
Calum Spring
This blog post is technical and aimed at programmers new to Unity.
Howdy readers,
This is going to be an introduction to using the Object Oriented programming principle of Inheritance in our game engine of choice, Unity 3D and programming language of choice, C#. Inheritance is one of the primary OO concepts and deals with creating classes that are parents and children of each other, allowing them to share information and functionality.
I thought for years that classical inheritance was incompatible with Unity’s Component-Object model but not only is this not the case, it’s implementation in Unity is particularly potent, and compatible with Unity’s inspector. The main advantages of using inheritance are twofold; firstly, Subtype Polymorphism allows parents and children to co-exist as members of a single array or list, as well as be substituted for each other as parameters for functions. Secondly, it means you can set up basic behaviour only once for any given object type, such as a bullet or enemy, and have that identical functionality shared across all subtypes.
Hopefully you’re already a little familiar with using inheritance, but how does it work in Unity? Let’s find out!
Step 1 - Creating a base (parent) class to extend from
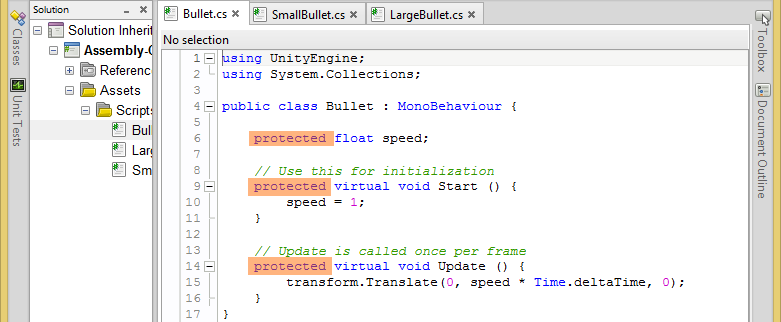
Creating the parent class is no different to creating any regular script file in Unity, with one exception; if you want a function to be over-ridable (adding extra functionality but also retaining base functionality) in a child class, that function needs to be made “virtual”. The following screenshot shows a virtual start and update function. Virtual functions are, confusingly, still real functions and can be called as such, but now they can also be extended by a child class. (Unity will helpfully let you know these functions also need to be public or protected, a keyword we’ll cover in step 2.)

Step 2 - Creating a child, how to use parent variables, and the keyword protected
You can start creating a child class again like any regular class, but there are a couple of changes to be made. Firstly, that bit of the class header where we say “ClassName : MonoBehaviour”? The class after the colon, in this case MonoBehaviour, is the parent we are inheriting from. We want to change that in our child class to be the new parent. Don’t worry, because the parent still inherits from MonoBehaviour we still have all of MonoBehaviour's functionality! (like transform and gameObject)

Now that we have a parent and child set up, let’s have our child access and use some of the variables it inherits from being a subtype of the parent. You should be familiar with the keywords public and private. Just like public variables are visible to the rest of your program, they’re visible to children too. And just like private variables are hidden to the rest of your program, they’re hidden to children too! It doesn’t take a genius to realize neither of these are ideal. There could easily be variables you want a subtype object to access that aren’t available to your whole program. This is where the keyword protected comes in. Protected variables (and functions) are halfway in between private and public: visible to children but not the rest of your project.
To test this theory you can create one public, one private, and one protected variable in your parent class. Try accessing them from your child. Then see which are available in Unity’s inspector if you attach that script (or perhaps the child script!) to an object.
Step 3 - Parent methods; overriding and newing
The last important, and probably most mind-bending, part of inheritance is how to use parent methods (aka member functions) in a child class. The protected keyword is useful here too but we also need to learn a few extra ones. As we learnt in step 1, parent functions need to be marked as virtual if you want them to be “overridden” by a child, so the first step is to ensure your function is virtual.
Next step is to recreate the same function in the child. Don’t make it virtual this time! You can add some new, subtype-specific functionality to this one. You can access and modify both parent and child variables in here to your heart’s content. Okay. Try running that and see what Unity says. You should get the below warning, because there’s a few more things we have to do. One option is to add the new keyword to our child’s function. But if you do this, it will act like the parent’s function of the same name doesn’t even exist. Not exactly what we want.

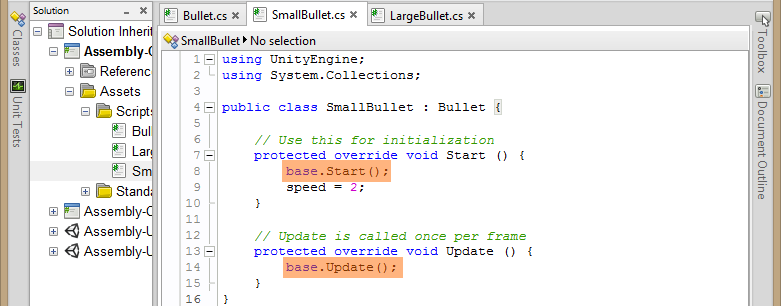
So, we also need to specify a new keyword to our child’s function to tell the program “This function is adding extra commands to an existing parent function”. We do this by specifying it as an “override” function. See the below image.

Almost there! Your code should compile without errors now, but your child function will be ignoring the parent’s. The last step is to actually call the parent function from the child one. You do this with the line “base.FunctionName();”. Base is another new keyword, it refers to “my parent class”. If you’ve used Java or ActionScript 3 before you might recognize it as the equivalent of super.
Our class relationship is complete! Any time the child function - be it Start, Update, or something we define ourselves - is called, it will do it’s subtype-specific functionality alongside that of it’s parent. (Before or after depending on where you placed the base line.)
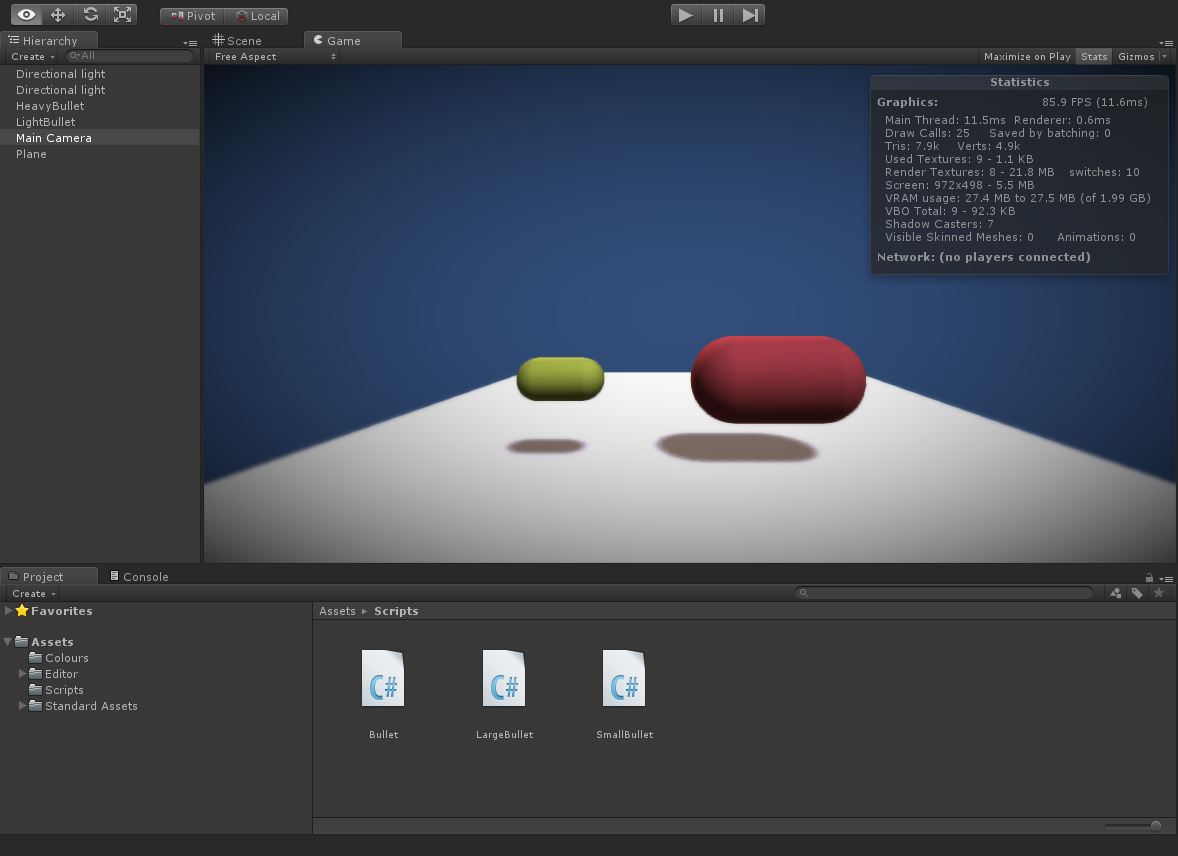
To use this setup in your games, attach subtype script files to your objects, such as SmallBullet.cs and LargeBullet.cs to their appropriate prefabs, and place all the functionality relevant to all of them in the parent Bullet.cs class. You don’t ever have to actually attach the parent script to anything! It will happily do it’s job from the shadows. With inheritance in place I can now create a list or array of Bullets and add both Small and Large bullets to it without a problem, they will peacefully coexist.
If you would like to download the project I created for this demonstration you can do so here, it’s compatible with Unity 4 and up: InheritanceProject.zip (130 KB)
Phew! Well done to anyone still reading, you should now have a greater understanding of how to utilize inheritance inside Unity 3D. Hopefully this aides you in future projects, I rely on it heavily to create expandable, readable code. In my next dev blog we’ll be looking at Unity’s player prefs library, a subject easier on the technical side but still aimed at programmers.
Until then, keep making games!
Calum