Contact Us

If you'd like to get in touch you can reach us at the following email addresses.

General Email: contact 'at' cardboardkeep.com

Press Enquiry: press 'at' cardboardkeep.com

Alternatively use the form on the right to contact us with general or press enquiries.

Cardboard Keep Video Policy
We hereby grant permission to any and all video content creators to use footage and gameplay of our games, and to place advertisements for the purpose of monetization in their videos of our games.
Please insert a link to our website in the video description, and feel free to contact us to let us know about the videos you make!


123 Street Avenue, City Town, 99999

(123) 555-6789

email@address.com


You can set your address, phone number, email and site description in the settings tab.
Link to read me page with more information.

combat-planning-blurred.jpg

Blog

Filtering by Category: Unity 3D

Dev Log: Texturing Levels in Warden

Timothy

TextureUVBlogBanner.png

Hey folks,

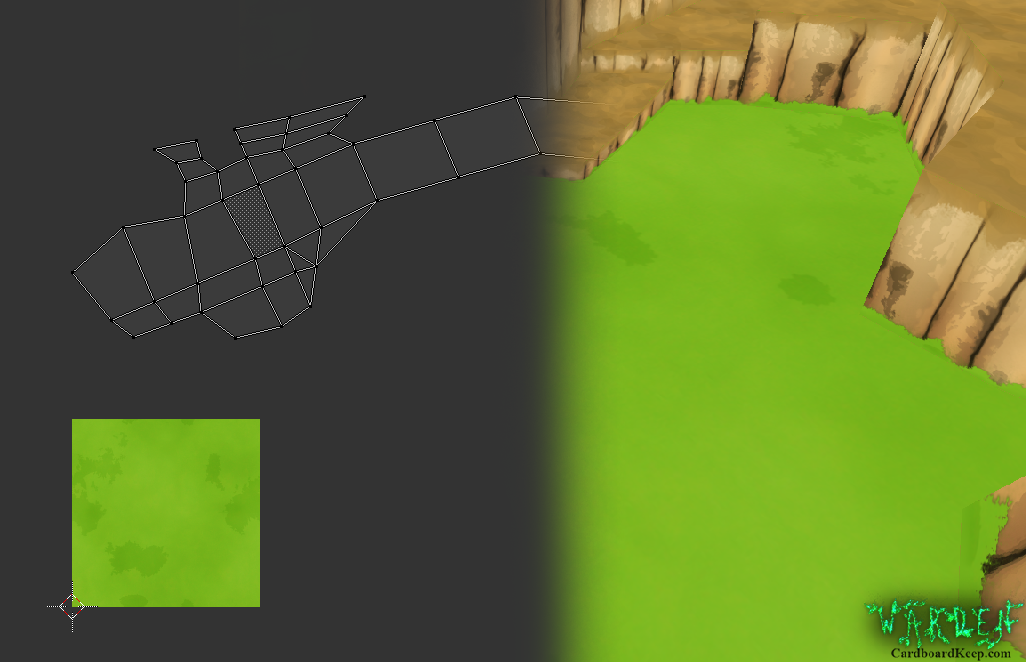
GrassUnwrap

Lets delve into our method for creating and texturing the levels in our upcoming game, Warden. Every level in Warden is built using Blender 3D. The base mesh of a level is created as a single, contiguous piece, with smaller details added in-engine later.

Textures are created or re-used based upon what and where the level is, and many variations upon them are used for blending purposes. The entire level is then UV mapped inside Blender. We apply textures to the faces of the level and export the mesh as an FBX. Doing so will cause Unity to create materials for each texture and assuming the texture is identically named within the project, this will automatically assign the correct texture to the material.

We do not embed our textures inside the level FBXs that would blow out the size of the project and cause double-ups of the textures in the project, which is just bloat.

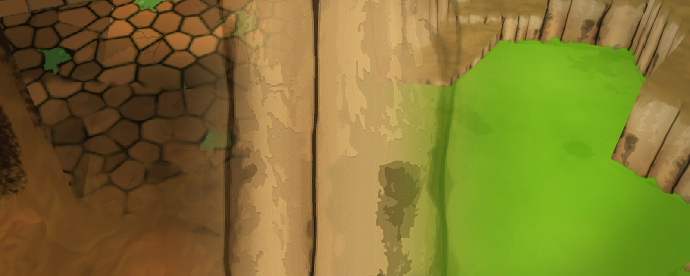
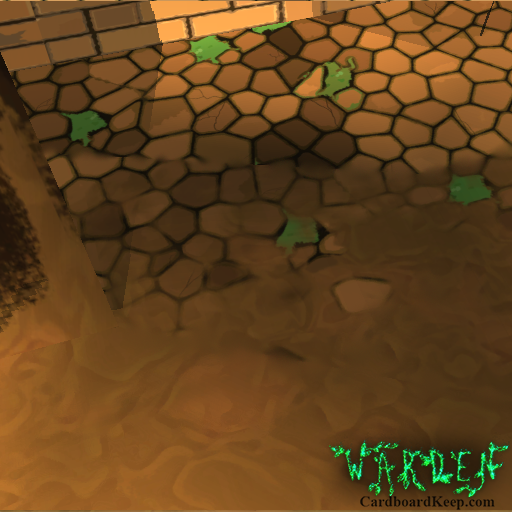
This texture is used to connect a mud floor to a brick floor. It is created by blending the two in photoshop.

When texturing in Blender the process is simple. Textures come in three types. Tiling (On both U and V), tiling only on U (Horizontally) and tiling only on V (Vertically). Often walls of the level will need to tile horizontally while the floors will need to tile in all directions. Only very thin and tall objects will only need to tile vertically.

Generally speaking we will block out segments of our level with UV seams to divide the textures into easily managed islands. After laying down the base textures we can add extra seams to apply transitional textures to blend between texture sets.

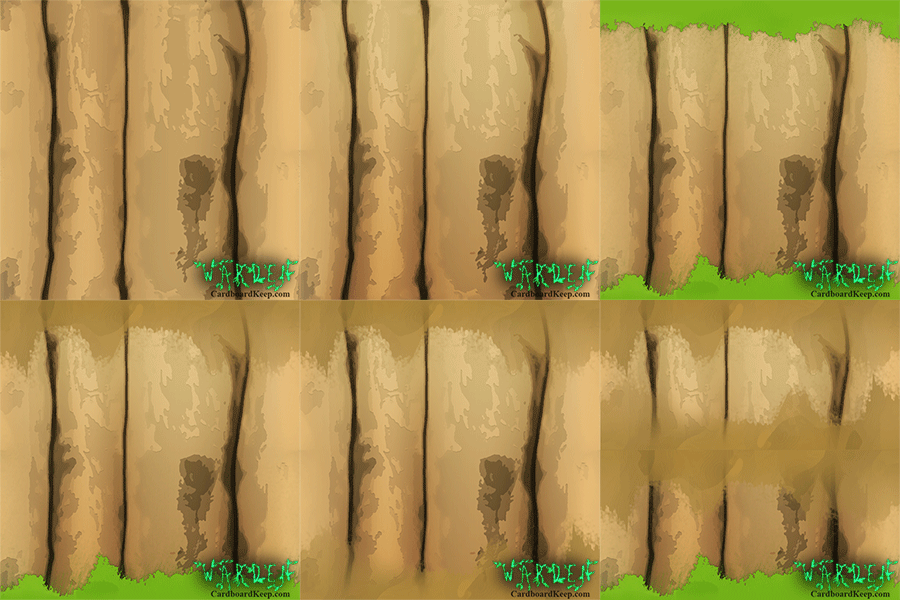
Tips and tricks: Texturing levels can be time consuming so ensuring solid mesh flow is key to not getting bogged down unwrapping. To avoid obvious seams you need to be careful about tiling textures and colours. Often large dark vertical shapes in the texture can be used to cover up a seam. making it much less obvious when playing the game.

This Cliff face connects grass to dirt and as such the unwrap is not pushed beyond the top and bottom of the texture.

Strengths of this technique:

  • Works well in unison with low-poly level geometry.
  • Easy to keep a consistent look and feel to areas.
  • Faster than tweaking unique textures for each level geometry.

Weaknesses of the technique:

  • Potentially uses a lot of textures (Texture atlases can help mitigate this).
  • Loses effectiveness with noisier textures (Takes much longer to make them line up right).

Happy texturing! Tim

Dev Blog: Fixing Texture Banding in Unity

Timothy

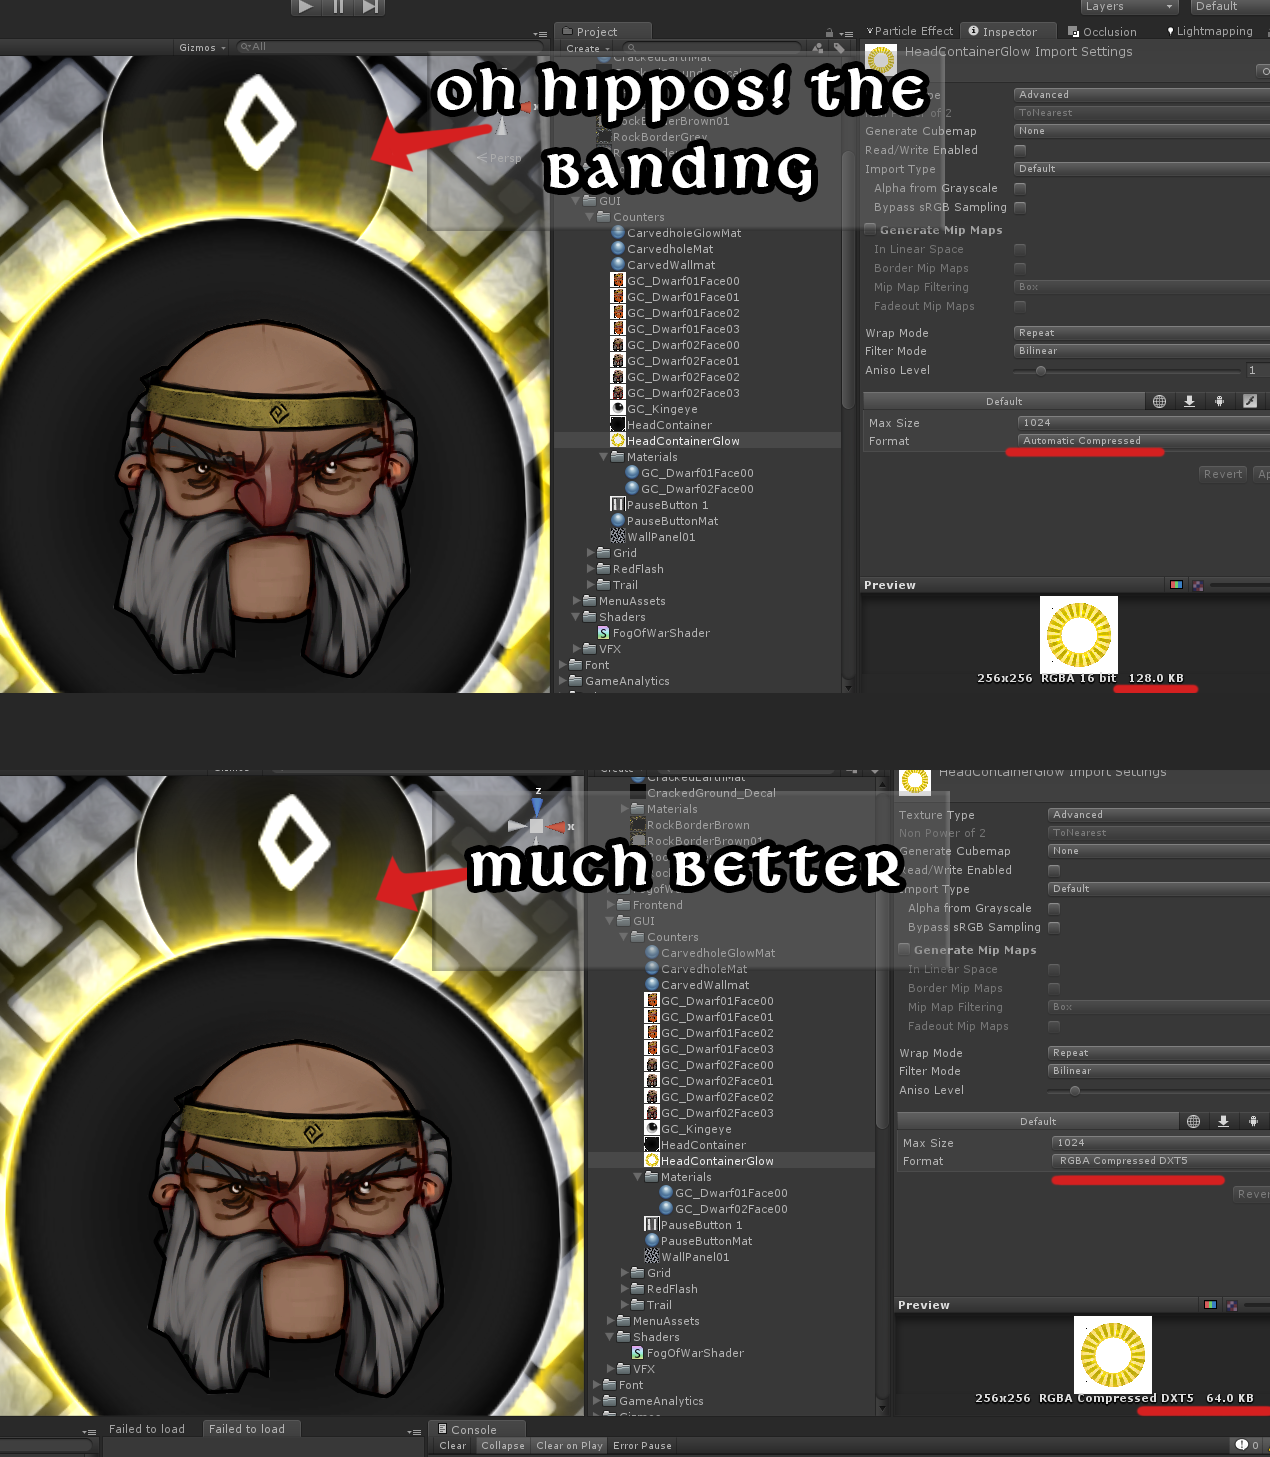
Hey Devaroos, Just a quick post from me today, but I had fun optimizing our current project, mainly looking at textures and materials. Whilst plumming the depths of the Unity project and fiddling with the import settings of our assets I discovered a surprising and quite frankly beautiful act of compression.

The default "automatic compression" in Unity doesn't like colour gradients. If one was to change the compression from automatic to DXT5 compression we not only have no more banding, which is awesome, but it also halves the size of the texture.

BandingFixOur programmer loved this, and the game looks better!

So if you are having trouble with a texture banding or having its colours blend horrifically, try changing the Texture Type setting to advanced, and the compression to DXT5. I encourage you to try out all the compression that Unity offers, as some can reduce the size immensely while maintaining or even improving perceived quality.

Thanks for your time, I hope this helps out.

Tim.

Dev Blog: Inheritance in Unity 3D

Calum Spring

This blog post is technical and aimed at programmers new to Unity.

Howdy readers,

This is going to be an introduction to using the Object Oriented programming principle of Inheritance in our game engine of choice, Unity 3D and programming language of choice, C#. Inheritance is one of the primary OO concepts and deals with creating classes that are parents and children of each other, allowing them to share information and functionality.

I thought for years that classical inheritance was incompatible with Unity’s Component-Object model but not only is this not the case, it’s implementation in Unity is particularly potent, and compatible with Unity’s inspector. The main advantages of using inheritance are twofold; firstly, Subtype Polymorphism allows parents and children to co-exist as members of a single array or list, as well as be substituted for each other as parameters for functions. Secondly, it means you can set up basic behaviour only once for any given object type, such as a bullet or enemy, and have that identical functionality shared across all subtypes.

Hopefully you’re already a little familiar with using inheritance, but how does it work in Unity? Let’s find out!
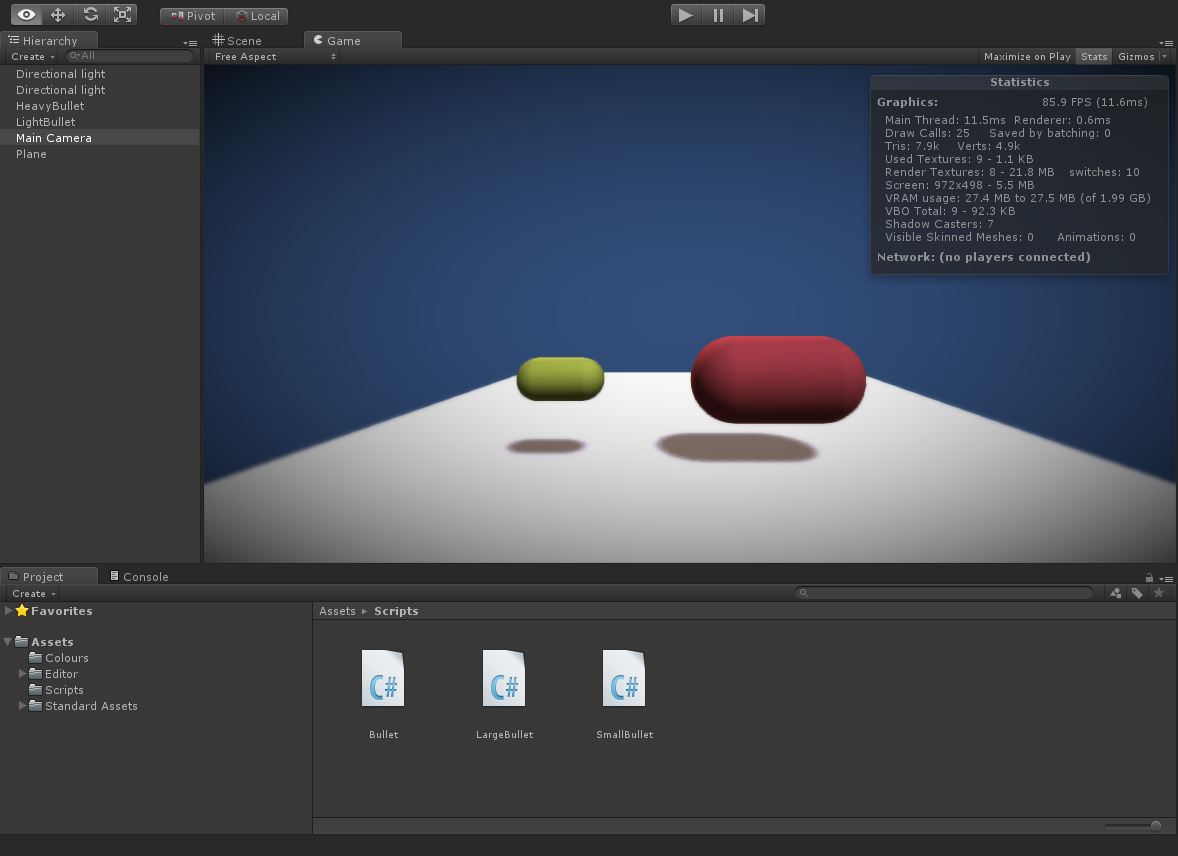
Project1

Step 1 - Creating a base (parent) class to extend from

Creating the parent class is no different to creating any regular script file in Unity, with one exception; if you want a function to be over-ridable (adding extra functionality but also retaining base functionality) in a child class, that function needs to be made “virtual”. The following screenshot shows a virtual start and update function. Virtual functions are, confusingly, still real functions and can be called as such, but now they can also be extended by a child class. (Unity will helpfully let you know these functions also need to be public or protected, a keyword we’ll cover in step 2.)

Script1

Step 2 - Creating a child, how to use parent variables, and the keyword protected

You can start creating a child class again like any regular class, but there are a couple of changes to be made. Firstly, that bit of the class header where we say “ClassName : MonoBehaviour”? The class after the colon, in this case MonoBehaviour, is the parent we are inheriting from. We want to change that in our child class to be the new parent. Don’t worry, because the parent still inherits from MonoBehaviour we still have all of MonoBehaviour's functionality! (like transform and gameObject)

Script2

Now that we have a parent and child set up, let’s have our child access and use some of the variables it inherits from being a subtype of the parent. You should be familiar with the keywords public and private. Just like public variables are visible to the rest of your program, they’re visible to children too. And just like private variables are hidden to the rest of your program, they’re hidden to children too! It doesn’t take a genius to realize neither of these are ideal. There could easily be variables you want a subtype object to access that aren’t available to your whole program. This is where the keyword protected comes in. Protected variables (and functions) are halfway in between private and public: visible to children but not the rest of your project.
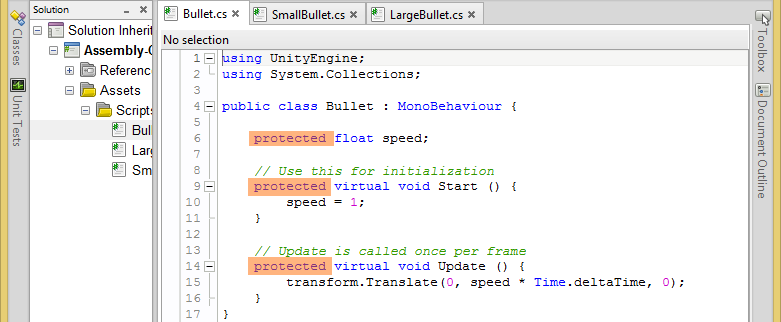
Script3

To test this theory you can create one public, one private, and one protected variable in your parent class. Try accessing them from your child. Then see which are available in Unity’s inspector if you attach that script (or perhaps the child script!) to an object.

Step 3 - Parent methods; overriding and newing

The last important, and probably most mind-bending, part of inheritance is how to use parent methods (aka member functions) in a child class. The protected keyword is useful here too but we also need to learn a few extra ones. As we learnt in step 1, parent functions need to be marked as virtual if you want them to be “overridden” by a child, so the first step is to ensure your function is virtual.

Next step is to recreate the same function in the child. Don’t make it virtual this time! You can add some new, subtype-specific functionality to this one. You can access and modify both parent and child variables in here to your heart’s content. Okay. Try running that and see what Unity says. You should get the below warning, because there’s a few more things we have to do. One option is to add the new keyword to our child’s function. But if you do this, it will act like the parent’s function of the same name doesn’t even exist. Not exactly what we want.

Warning1

So, we also need to specify a new keyword to our child’s function to tell the program “This function is adding extra commands to an existing parent function”. We do this by specifying it as an “override” function. See the below image.

Script4

Almost there! Your code should compile without errors now, but your child function will be ignoring the parent’s. The last step is to actually call the parent function from the child one. You do this with the line “base.FunctionName();”. Base is another new keyword, it refers to “my parent class”. If you’ve used Java or ActionScript 3 before you might recognize it as the equivalent of super.
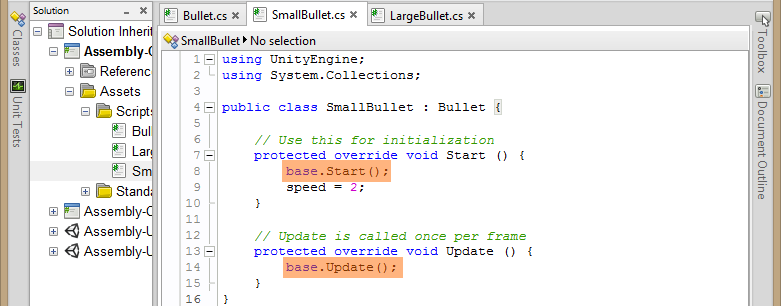
Script5

Our class relationship is complete! Any time the child function -  be it Start, Update, or something we define ourselves - is called, it will do it’s subtype-specific functionality alongside that of it’s parent. (Before or after depending on where you placed the base line.)

To use this setup in your games, attach subtype script files to your objects, such as SmallBullet.cs and LargeBullet.cs to their appropriate prefabs, and place all the functionality relevant to all of them in the parent Bullet.cs class. You don’t ever have to actually attach the parent script to anything! It will happily do it’s job from the shadows. With inheritance in place I can now create a list or array of Bullets and add both Small and Large bullets to it without a problem, they will peacefully coexist.

If you would like to download the project I created for this demonstration you can do so here, it’s compatible with Unity 4 and up: InheritanceProject.zip (130 KB)


Phew! Well done to anyone still reading, you should now have a greater understanding of how to utilize inheritance inside Unity 3D. Hopefully this aides you in future projects, I rely on it heavily to create expandable, readable code. In my next dev blog we’ll be looking at Unity’s player prefs library, a subject easier on the technical side but still aimed at programmers.

Until then, keep making games! Calum

Dev Blog: Alpha Outlines

Timothy

Hey guys,

In this blog post we are going to take a look at the use of alpha, and the horrible artifacts that can occur in it’s implementation. There are a wide variety of shaders that utilize the alpha channel of a texture to create transparent objects. These can range from glass to grass, but we are focusing mainly on how alpha can get those garish white or black outlines even though the alpha channel is crystal clear.

Examples02

The problem lies essentially in mipmapping, which is texture LoDing (Level of detail) using texture compression. So we need to understand that when the texture is compressed or mipmapped, the texture is changed from how one painted it. This is effectively rescaling the image and blurring the alpha.

Suddenly the texture that was once saying only show the nice tree leaves, is now telling the shader to show a slightly larger outline around the shape, due to the blurring of the texture. There are few options available here.

  • Don’t use mipmaps and texture compression (such as disabling them in unity).

  • Paint your own mip maps.

  • Paint an average approximation of the colour filling the rest of the texture.

Examples

By far the easiest and quickest solution is to fill the background of the image with a colour close to the borders of your image.

Alpha can cause a lot of annoying little problems, and I see this one pop up all the time. I hope it can help you guys out and if you have any tips for working with Alpha images, leave a comment.

Tim out.

Oculus Rift Day 2: Developing with Unity 3D

Calum Spring

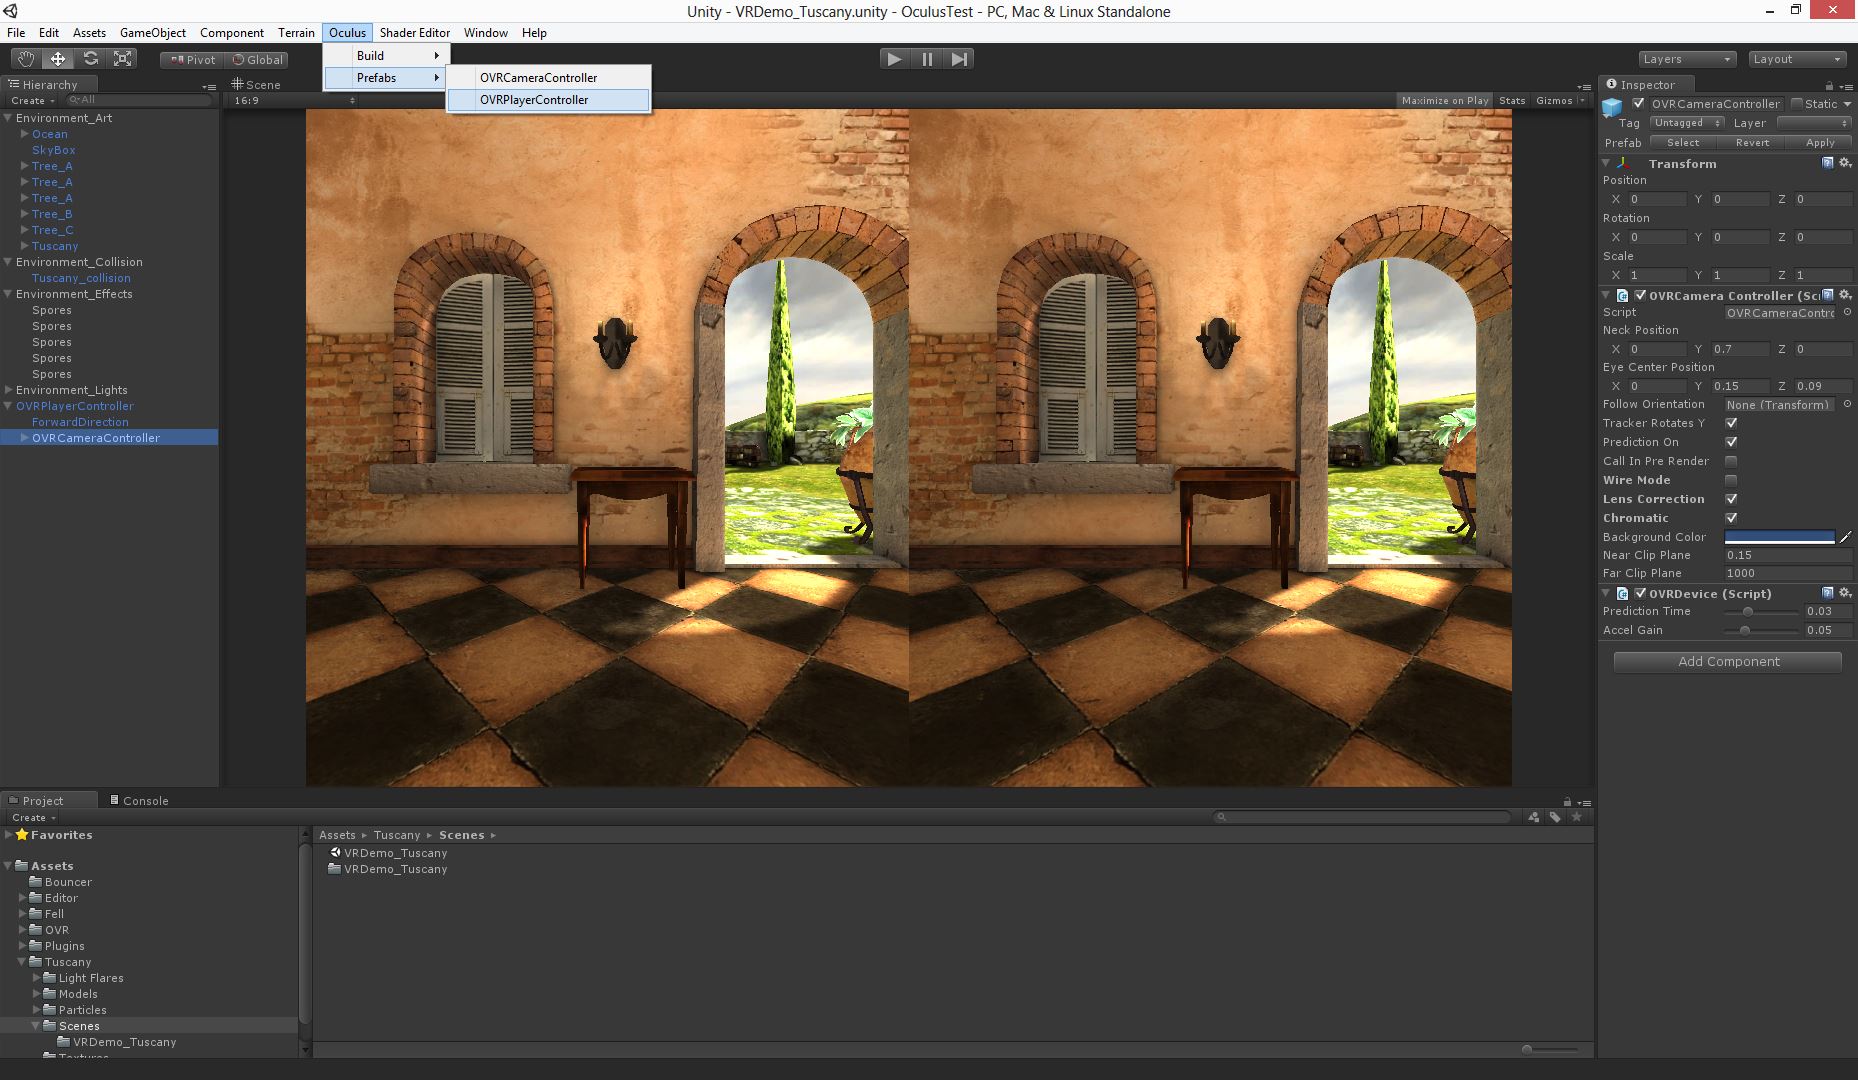
Our engine of choice is Unity 3D and luckily enough, thanks to the great folks at Oculus, it has day 1 development support for the Rift. Not just token support either, this stuff is robust and documented. You can download the OVR library from the Oculus dev portal, and it plugs into Unity as easily as any Unity Package, a double-click and you're away.

RiftTuscany

Oculus provides prefabs for their two-camera setup, including one with a basic character controller. Adding basic Rift support to your games is as easy as choosing which prefab to add.

Unfortunately the Unity preview window can't go full-screen, so unless you like headaches, testing your game with the Rift requires a quick build. The Oculus plugin provides a button to make this an express procedure.

RiftFellChars

There are a few issues to be aware of regardless of the game you make; camera clipping through your avatar's shoulders, the low resolution making distant detail and text difficult to read, and rendering everything twice from two cameras. Like any hurdles in game development these can be addressed with time and effort.

Overall the process is essentially painless. Kudos to Oculus and Unity Technologies for this great integration.

Join us next week for our experiences playing a few Rift-ready games and some predictions for where VR goes from here.